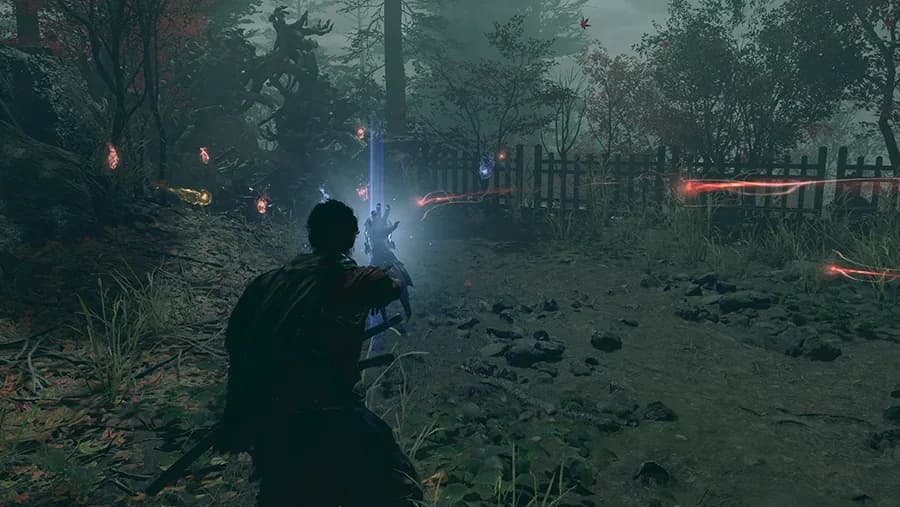
Onimusha Way of the Sword Gameplay centers on close-range sword exchanges, deliberate defensive choices, and the souls Musashi draws into his Oni Gauntlet. You control a single samurai through a dark fantasy version of Kyoto, moving between exploration and encounters with Genma. The most revealing part of a fight is often the instant an enemy attacks, because that is when blocking, parrying, deflecting, dodging, and Issen lead to different outcomes.
A sword fight changes direction with each exchange
Musashi's katana provides quick one-handed attacks and heavier two-handed attacks with a longer preparation. The two options affect how much time you commit to an opening and how easily you can respond when an opponent moves again. Watching a full exchange, including the enemy's answer, tells you more about the combat than a string of finishing animations.
A good sequence can move from an incoming strike to a defensive response and then into Musashi's own attack without a lengthy pause. That continuity is central to the game's presentation: defense remains part of the duel rather than simply delaying your next chance to act. If you are deciding whether the game suits you, pay attention to whether you enjoy reading those exchanges as much as initiating them.
The focus on a katana also changes what progression means during ordinary fights. You are learning more ways to use a familiar core weapon instead of constantly replacing it with a completely different basic moveset. Special weapons enter through Oni Armaments, which connect their availability to the souls collected by the Gauntlet.
Read health and stamina together
Enemy health records the lasting damage you inflict, while stamina helps determine when you can force a major opening. Normal attacks and well-chosen defensive actions contribute to that pressure. This gives an exchange value even when it does not immediately remove a large section of the health bar.
A stamina break creates the opportunity for Break Issen. Against a weaker enemy it can end the fight, while a boss gives you a more deliberate target decision. Red targets emphasize immediate damage, and purple targets trade some of that damage for souls that can support your next actions.
That choice is worth watching in gameplay footage because two apparently similar finishing sequences may serve different purposes. A player recovering resources is making a different decision from one trying to end the encounter before another attack cycle. The Issen and Break Issen guide explains the timing mechanics once you want to move from observation to practice.
Defensive actions have distinct visual results
A held block is the simplest protective action, but repeated impacts reduce Musashi's stamina. Letting that meter empty can break his stance and cost him souls, which means surviving an attack is not the only measure of a successful defense. A sequence of blocked hits can therefore be a warning that the player is losing control of the exchange.
A timed parry sends a strike aside and can leave room for a counterattack. Repeated successful parries also build the Blaze Gauge toward a Blazing State, giving precise defense consequences beyond the immediate animation. When watching a skilled player, look for the repeated timing decisions that produce that state instead of treating its effects as an unrelated power-up.
Deflection focuses heavily on enemy stamina and can return projectiles to their sender. It does not always stop an opponent's sequence, so a player may need to read the next attack immediately after a successful input. That continuing back-and-forth is one reason a long uncut fight is more useful than a montage for understanding the pace.
Dodging has its own role, including attacks such as certain punches, kicks, and grabs that do not invite the same response as a blade. A precisely timed Reflex Dodge can later interact with the Reflex Gauge and create an opportunity for a fast counter sequence. The game asks you to recognize the kind of threat in front of you, not simply repeat one defensive button against every animation.
Issen and blade clashes punctuate the action
Issen begins with Musashi attacking just before an enemy's hit arrives. The window is tighter than an ordinary parry, so the visible payoff comes with a greater demand on timing. A successful clip can make the technique look automatic even though its setup depends on recognizing the incoming move.
Blade Barrages are a different interaction that can begin when opposing attacks meet at the same instant. Continuing successfully involves switching between the light and heavy attack choices rather than treating the clash as an ordinary uninterrupted combo. Blade Locks can also arise from defensive exchanges, with repeated attack inputs used to overpower the opponent.
These moments create the impression of swordsmen contesting control at very close range. They also interrupt the expectation that every attack either deals damage immediately or misses completely. For practical input help, use the combat fundamentals guide, which focuses on performing the actions rather than interpreting the overall experience.
Souls keep the action moving after a kill
Enemies leave souls that Musashi must actively draw into his Gauntlet. They do not simply become inventory resources the instant an enemy dies, and more distant souls take longer to reach him. This creates a small but meaningful continuation after combat, when you check the area and decide whether it is safe to collect what remains.
The HUD can show nearby absorbable souls beside the Red Soul counter. If those indicators are still present, rushing onward can leave part of your reward behind. Watching for them also explains why a player may pause after a fight that otherwise appears to be finished.
Oni Armaments draw on the magical resources associated with blue souls. Their use gives you a burst of a different offensive option without replacing Musashi's everyday katana. The weapons and Oni Armaments guide covers that relationship in more detail for players who want to understand the equipment side of the combat.
Some bosses can absorb souls as well, turning a resource collection habit into a contested part of the encounter. Daidara makes that struggle particularly visible, since neglecting loose souls can help him power up. The result is a fight in which a safe pause may be better spent gathering resources than forcing another sword strike.
Kyoto provides space between encounters
The setting combines recognizable Kyoto locations with corruption and Genma rather than presenting an ordinary historical city. Musashi moves through areas that alternate scenery, exploration, and combat opportunities. That change of pace gives the player room to look around and recover attention between demanding exchanges.
Exploration includes hidden chests and information about enemies. A blue glow from the Gauntlet can indicate a nearby hidden chest, and using Oni Power can reveal it. Such signals reward noticing the environment instead of judging every quiet area only by how quickly it leads to another battle.
Boss arenas can also be worth revisiting for Genma Notes after the fight itself is over. Collecting those notes contributes to the Genma-ologist achievement, giving a practical reason to return rather than assuming the arena has no further purpose. The walkthrough and exploration guide is the appropriate companion when you want route decisions alongside the action.
Evaluate a full encounter before judging difficulty
A player who already recognizes an attack can make an encounter look much easier than it feels on a first attempt. Look for moments where they wait, reposition, or select a different defense, since those decisions explain the apparent smoothness. A missed counter and the recovery afterward can reveal more about the learning process than another perfect finishing blow.
Story and Action offer different starting experiences, with Carnage unlocking after a first completion. Difficulty selection therefore matters when comparing demonstrations, especially if one emphasizes accessibility and another shows demanding counter sequences. The difficulty settings guide explains those options before you commit to a style of play.
If visual effects make an opponent difficult to read, focus on the attacking arms or legs instead of following the weapon's bright trail. On PC, reducing Bloom can make that observation easier without changing the underlying attack. Compare the same encounter after an adjustment so that you are evaluating visibility rather than a completely different enemy.
The expanded demo provides a direct way to test these impressions with your own controls and display. Its Ganryu and Daidara encounters let you compare a sword duel with a larger enemy that brings soul management into the fight. Use that contrast to decide whether the combination of timing, resource collection, and close-range action holds your attention.